

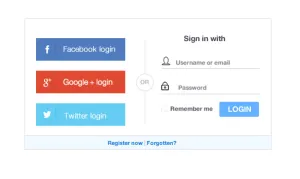
Xin chào các bạn, hôm nay mình sẽ hướng dẫn các bạn cách login với tài khoản Facebook và Gmail nhé.
Trước hết vẫn là tạo 1 project Laravel. Cái này đã quá quen thuộc nên mình sẽ ko hướng dẫn lại nữa.
- Link document hướng dẫn chạy project Laravel
Trong phần này mình sẽ sử dụng package có sẵn laravel/socialite
composer require laravel/socialiteTiếp theo là tạo migrate cho bảng users đê lưu dữ liệu tài khoản đăng nhập
public function up()
{
    Schema::create('users', function (Blueprint $table) {
        $table->bigIncrements('id');
        $table->string('name');
        $table->string('email')->nullable()->unique();
        $table->timestamp('email_verified_at')->nullable();
        $table->string('password')->nullable();
        $table->rememberToken();
        $table->timestamps();
    });
}
Cấu hình file .env
FACEBOOK_CLIENT_ID=13467*****
FACEBOOK_CLIENT_SECRET=*****************
CALLBACK_URL_FACEBOOK=https://domain.com/callback/facebook

GOOGLE_CLIENT_ID=9675********3s1e9q421l2p.apps.googleusercontent.com
GOOGLE_CLIENT_SECRET=BWVpYK**********wFwmdSa9p
CALLBACK_URL_GOOGLE=https://domain.com/callback/google
Trong folder config/services:
'facebook' => [
        'client_id' => env('FACEBOOK_CLIENT_ID'),
        'client_secret' => env('FACEBOOK_CLIENT_SECRET'),
        'redirect' => env('CALLBACK_URL_FACEBOOK'),
    ],
    'google' => [
        'client_id' => env('GOOGLE_CLIENT_ID'),
        'client_secret' => env('GOOGLE_CLIENT_SECRET'),
        'redirect' => env('CALLBACK_URL_GOOGLE'),
    ],
Tạo Models cho bảng user
php artisan make:model Models/Users- trong models ta thêm các code sau:
namespace App\Models;

use Illuminate\Notifications\Notifiable;
use Illuminate\Foundation\Auth\User as Authenticatable;

class User extends Authenticatable
{
    use Notifiable;

    /**
     * The attributes that are mass assignable.
     *
     * @var array
     */
    protected $fillable = [
        'name', 'email', 'password','locale','phone'
    ];

    /**
     * The attributes that should be hidden for arrays.
     *
     * @var array
     */
    protected $hidden = [
        'password', 'remember_token',
    ];
}
Tạo route
Route::get('/social/{provider}', 'Auth\LoginController@redirect')->name('auth.social');
Route::get('/callback/{provider}', 'Auth\LoginController@callback')->name('auth.social.callback');
Tạo Controler để Login (Logincontroller)
php artisan make:controller Auth/LoginController- Bên trong LoginController sẽ viết code để xử lý đăng nhập
namespace App\Http\Controllers\Auth;

use App\Http\Controllers\Controller;
use Illuminate\Foundation\Auth\AuthenticatesUsers;
use Socialite;
use Auth;
use Exception;
use App\User;
use Illuminate\Http\Request;
use Validator,Redirect,Response,File;
use Session;

class LoginController extends Controller
{
    /*
    |--------------------------------------------------------------------------
    | Login Controller
    |--------------------------------------------------------------------------
    |
    | This controller handles authenticating users for the application and
    | redirecting them to your home screen. The controller uses a trait
    | to conveniently provide its functionality to your applications.
    |
    */

    use AuthenticatesUsers;

    /**
     * Where to redirect users after login.
     *
     * @var string
     */
    protected $redirectTo = '/';

    /**
     * Create a new controller instance.
     *
     * @return void
     */
    public function redirect($provider) {
        Session::flash('back_url',$_SERVER['HTTP_REFERER']);
        return Socialite::driver($provider)->redirect();
    }
    public function callback($provider) {
        $getInfo = Socialite::driver($provider)->stateless()->user();
        $link = $_COOKIE['link_file']??'';
        // Nếu thông tin facebook trả về không có Email thì thông báo
        if(!$getInfo->email) {

            return redirect(Session::get('back_url','/'))->with(['flash_level'=>'danger','flash_message'=> 'Tài khoản của bạn không hoạt động.']);

        } else {
            // Nếu có Email thì check tồn tại trong hệ thống
            $findUser = User::where('email', $getInfo->email)->first();
            // nếu tồn tại user trong DB thì đăng nhập còn không thì đăng ký
            if($findUser != null){
                if ($findUser->status == 1) {
                    Auth::login($findUser, true);
                    return Redirect::to($link);
                } else {
                    return redirect(Session::get('back_url','/'))->with(['flash_level'=>'danger','flash_message'=> 'Tài khoản của bạn không hoạt động.']);
                }
            } else {
                $created_at = $updated_at = date('Y-m-d H:i:s');
                $user = [
                    'username' => $getInfo->id,
                    'email' => $getInfo->email,
                    'name' => $getInfo->name??$getInfo->email,
                    'password' => bcrypt('*******'),
                    'status' => 1,
                    'created_at' => $created_at,
                    'updated_at' => $updated_at,
                ];
                $user_id = User::insertGetId($user);
                Auth::login(User::find($user_id),true);
               return Redirect::to($link);
            }
        }
    }
}
Cuối cùng ta chỉ cần thêm link cho nút login bằng facebook và trải nghiệm thôi, chẳng hạn thêm FB Login vào trang welcome.blade.php như mình chẳng hạn.
Ok vậy là chúng ta đã đăng nhập thành công! chúc các bạn thành công.